Now that the holiday season is upon us, our minds are turning to gifting. Gifts for loved ones, gifts for friends, gifts for neighbors- we want them all to be meaningful, something that will be treasured for years to come. We decided to make our gifts memorable this year with some handmade ornaments created with rainbow marbled salt dough, and it was extra special because the twins were able to participate in every step of the process!

Making the Dough
To make our rainbow marbled salt dough, we mixed a double batch of basic salt dough using this classic recipe (the recipe below is for a single batch):
- 2 cups all purpose flour
- 1 cup salt
- 1 cup warm water
Combine your dry ingredients and then slowly add your water, mixing until you have a dough-like consistency. At this point you can decide to leave it natural and add color by painting your ornaments or sculptures after they are dry, OR you can knead in some color and give our marbled dough a try!

Adding Color
*This post contains affiliate links.
To color our dough, I divided the batch into four equal mounds (remember, I doubled the recipe) and added several squirts of liquid watercolors![]() to each mound, kneading in the color to create yellow, blue, pink, and green. I occasionally had to add more flour to keep the dough from getting too sticky. If you saw our marbled autumn salt dough post, you know that last time I used powdered tempera paint to add the color. Although it took longer to knead in, I have to say that the powdered tempera paint yielded the most vibrantly colored dough- these little hearts were much more on the pastel side, even though I added a LOT of liquid watercolors. Just an FYI- it depends on your desires for the end product. The pastels were really quite stunning, so we didn’t mind one bit! Food coloring could also be used for adding color to the dough, and some of my readers have reported that pre-mixed tempera paint worked well for the autumn leaves version, too- it’s just a bit messier during the kneading process.
to each mound, kneading in the color to create yellow, blue, pink, and green. I occasionally had to add more flour to keep the dough from getting too sticky. If you saw our marbled autumn salt dough post, you know that last time I used powdered tempera paint to add the color. Although it took longer to knead in, I have to say that the powdered tempera paint yielded the most vibrantly colored dough- these little hearts were much more on the pastel side, even though I added a LOT of liquid watercolors. Just an FYI- it depends on your desires for the end product. The pastels were really quite stunning, so we didn’t mind one bit! Food coloring could also be used for adding color to the dough, and some of my readers have reported that pre-mixed tempera paint worked well for the autumn leaves version, too- it’s just a bit messier during the kneading process.

Mixing the Colors
So here’s where the real fun begins- mixing up the colors! I gave each child a hunk of all four colors and encouraged them to play and mix to their hearts’ content. Both played for quite awhile with the dough, making up stories, building “castles,” etc., until I eventually had them pile up their scraps in a big mound (see photo below). *Tip- the smaller your pieces, the more of a “marbled” effect your finished ornaments will have.

Next, with a little help from me, they each rolled their “mountains” into smooth slabs of marbled color.

After we cut out all our ornaments using these heart cookie cutters![]() (I love the scalloped edges mixed in with the smooth hearts), I used a skewer (you can also use a plastic drinking straw) to poke a hole in each one and then baked them for almost two hours on the lowest setting, flipping occasionally to keep both sides drying evenly and prevent browning. After they were dry, the colors were a bit muted, so we added a coat of Mod Podge to the “good side” of each ornament. I used matte Mod Podge
(I love the scalloped edges mixed in with the smooth hearts), I used a skewer (you can also use a plastic drinking straw) to poke a hole in each one and then baked them for almost two hours on the lowest setting, flipping occasionally to keep both sides drying evenly and prevent browning. After they were dry, the colors were a bit muted, so we added a coat of Mod Podge to the “good side” of each ornament. I used matte Mod Podge![]() on these, and glossy Mod Podge
on these, and glossy Mod Podge![]() on my autumn leaves version- I liked the glossy finish best, but these still turned out beautifully.
on my autumn leaves version- I liked the glossy finish best, but these still turned out beautifully.


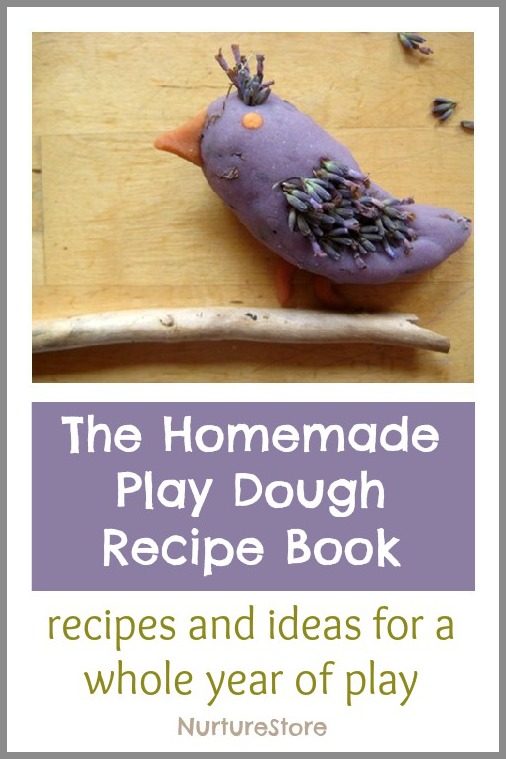
The Homemade Play Dough Recipe Book
*This is an affiliate link- thanks for supporting Twodaloo!
If you love play dough, (or salt dough, or bread dough…) as much as we do, I highly recommend that you check out The Homemade Play Dough Recipe Book written by Cathy James of NurtureStore. It is a super creative e-book packed with amazing ideas regarding all things play dough, including:
- all the recipes you need for the activities in the book including non-cook and cooked play dough, gluten-free dough, salt dough, modeling dough, and real bread.
- ideas for 52 weeks of loose parts play, in a printable poster format
- a whole year of play dough activities, arranged seasonally. There’s an idea for every week of the year including sensory and imaginary play, storytelling, art ideas, small worlds, math activities, reading and writing ideas.
This post has been shared at some of these fabulous link parties.


Oh my! These look sooooo amazing. Well done for coming up with such a great idea. Love all your ideas though.
Kate
Aww, Kate, thanks so much! You are so sweet 😉
What a lovely effect - and so versatile with it’s options. Because you used heart cookie cutters, I couldn’t help but think of making red and white ones for Valentine’s Day… but Christmas decorating comes first!
Yes! We actually have Valentine’s Day themed ones coming out this week!!
Wow what a great idea, thanks for posting!
Will try it out this week with my two toddlers as will make great gifts.
Jessie x
Yay! Did you try it out? I hope you had a great holiday season!
These are so pretty!
Thank you, Terri!
Oh am I ever glad I bought the book at half price! Looks like it’s very popular if you’re sharing about it too!
Definitely! I love Cathy’s books!
This is such a wonderful and beautiful idea! We will definitely be trying it out! My son has the same Batman shirt too :).
Hah! He loves that shirt 😉 Did you get a chance to try it out? I’d love to see the results if you did!
This feels like a dumb question, but… I baked mine for way longer than 2 hours (at 150 for a little over 4 hours), but they’re still a bit soft. Should I keep baking, or is that ok? They’re about as thick as a rolled cookie. (1/4 inch?)
My two year old loved playing with the dough and cutting out shapes, thank you for the inspiration!
Sorry to just now be getting back to you Laura- the holidays really threw me off my schedule! If I remember correctly, mine were still a little soft after baking, but I just let them air-dry overnight and they were fine. I just took down my tree today and was sad to put them away How did your turn out?
I only had cocktail salt and it worked great. Thanks for the great idea.
Awesome! Good to know that cocktail salt works, too! Thanks, Donna!
i am having problems with the dough staying very sticky. I add more flour but the design came out with a floured dusk look.